Importing data to entities
Importing data from Excel
Section titled “Importing data from Excel”This guide explains how data may be uploaded and imported into the DatAscend application using a spreadsheet. It describes the required file format, the behavior of the import modal, and procedures for troubleshooting common issues.
Prerequisites
Section titled “Prerequisites”- An active user account with permission to import data is required.
- If the Import button is not visible in the menu, the administrator should be contacted.
- Supported file types are
.xlsx,.xls.- For Excel files (
.xlsx,.xls) the import process reads only the first worksheet.
- For Excel files (
- The data to be imported must reside on the first sheet of the workbook, and the first row must contain column headers.
About the entity structure
Section titled “About the entity structure”The entity structure defines the fields available for mapping during import. The entity structure can be viewed in the application by navigating to the studio.
- An entity on the studio will look like this:
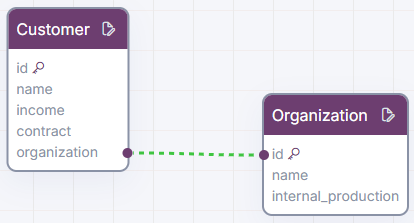
Each of the fields shown in the entity structure may be mapped to a column in the spreadsheet during the import process.
- Some fields which name are reserved for internal use and cannot be mapped.
- For example, the
idfield is automatically generated by the system and should not be included in the import file.
- For example, the
- The fields which belong to an entity relationship will not be available for mapping, as they are not imported directly.
- The current example entity has relationship field named
organization, which does not appear in the list of mappable fields during import.
- The current example entity has relationship field named
File Format Requirements
Section titled “File Format Requirements”- Text columns containing leading zeros (for example,
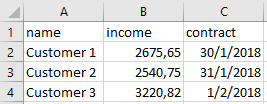
00123) should be formatted as Text in Excel to preserve the zeros. - The first row must contain column headers. These headers identify each column; manual remapping will be necessary.
- Blank rows between data rows must be avoided; they will be interpreted as empty records.
- Each subsequent row represents a single record.
Example header row:
name,outcomes,contract
Step-by-Step Instructions
Section titled “Step-by-Step Instructions”-
Users should log in to the application.
-
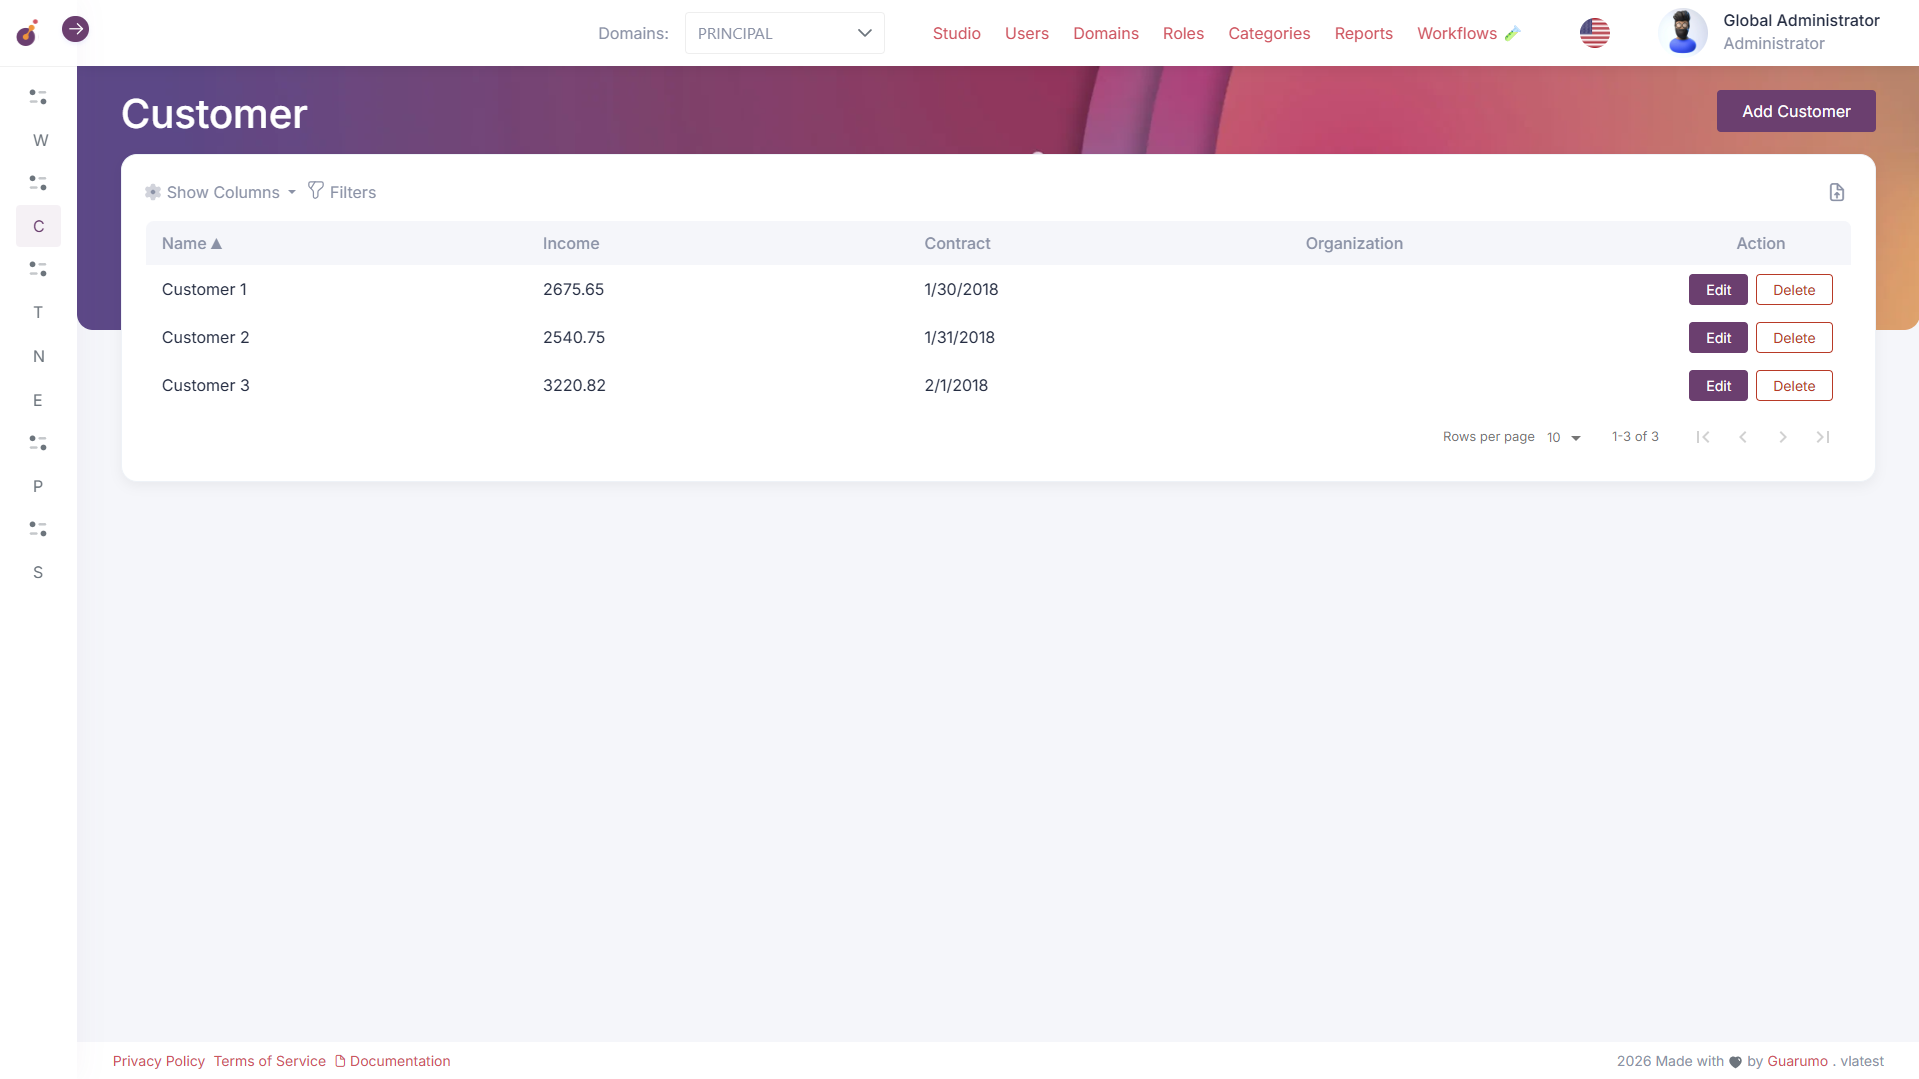
Navigate to the entity into which the data will be imported. Verify the entity structure to understand which fields are available for mapping.
-
The import modal can be opened by clicking the Import icon in the toolbar, right side to the Filters button.
-
The button may not be available if the user does not have permission to import data or if the entity does not support import.

-
-
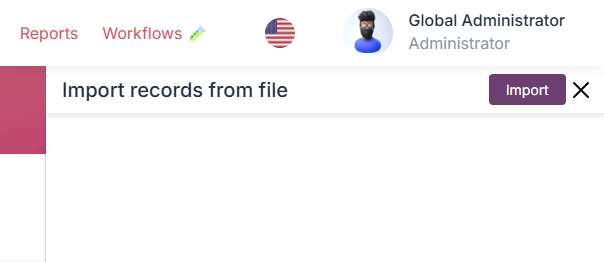
The import side panel opens with instructions and a button to start the import process. Click on the import button to proceed.
-
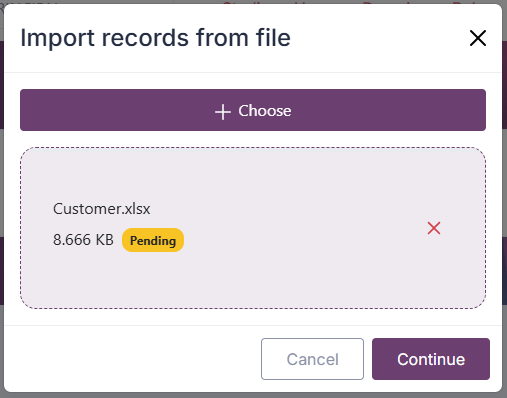
The import modal opens, allowing the user to select or drop a file to import. The file can be chosen by clicking the + Choose button and selecting a valid file.
-
The system reads the first row immediately to identify column headers.
-
Only the first file selected is used; additional files are ignored.
-
After the file is selected, click on the Continue button to proceed to the mapping step.
-
-
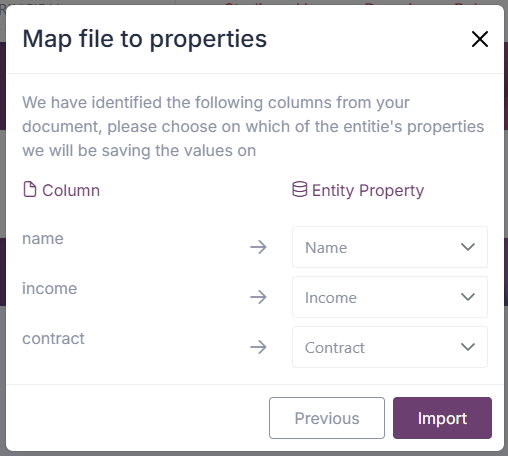
The modal displays the detected column names in a list. Those columns which have been successfully identified are shown with their header names, and can be mapped to entity fields.
-
Headers that are blank or invalid may appear as empty entries (""), you can click Previous to return to stop the import process and edit the file.
-
Select each of the mappings with the respective field from the entity structure. If a column should be ignored, it can be left unmapped.
-
Mandatory fields are not enforced at this stage, but validation will warn if they are missing.
-
After all mappings are set, click the Import button to start the import process.
-
-
Validation is performed and the import process is started.
-
After at least one column has been mapped, click Import to start the process.
-
The application sends the file and mapping information to the server; the actual import executes as a background job.
-
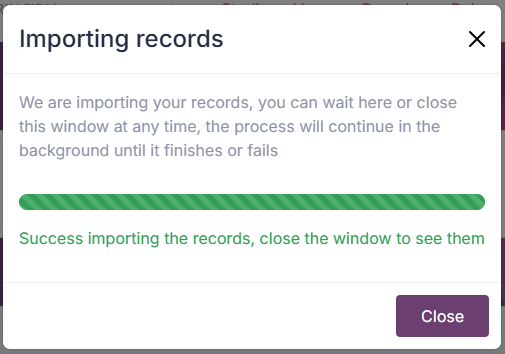
A progress bar indicates percent completion. The client polls the job status every two seconds.
-
If the job fails, the progress section displays error messages returned by the server.
-
The user may continue working elsewhere while the import runs.

-
-
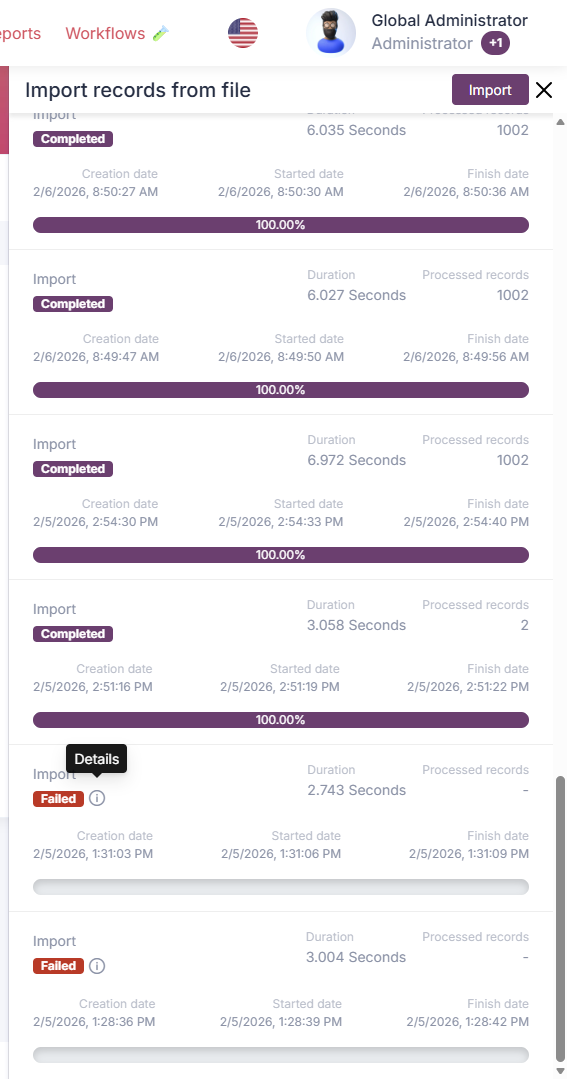
Upon completion a report is presented.
-
When progress is complete, a success message appears.
-
The dialog may be closed using the Close button; the page may be refreshed to view newly imported data.
-
-
If any records failed, you might want to:
-
Review the error messages to identify issues with specific rows or fields.
-
On the import side panel, look out for the Failed import section
-
Click on the icon Details to view the error messages for each failed record.
-
-
-
Edit the original spreadsheet to correct errors and re-import only the failed records.
Common Errors and Solutions
Section titled “Common Errors and Solutions”-
Header mismatch
- Description: The first row does not use correct field names.
- Solution: Edit the header names in Excel or adjust the mapping during the modal.
-
Invalid date format
- Description: A cell contains a date not in the correct format for the system to recognize.
- Solution: Convert the column to the proper format or use Excel’s DATE function. Also adjusting the system’s regional settings may help if the issue is related to date formats.
-
Numeric format error
- Description: Decimal numbers use a period
.instead of a comma,or vice versa, depending on regional settings. - Solution: Replace each with the correct decimal separator in the spreadsheet or adjust the system’s regional settings.
- Description: Decimal numbers use a period
-
Required field empty
- Description: One or more required columns have blank cells.
- Solution: Fill in missing values before importing. The required field should be mapped.
-
File too large
- Description: The spreadsheet exceeds the permitted size.
- Solution: Divide the data into multiple smaller files and import them separately.
-
Permission denied
- Description: The user role does not include data import rights.
- Solution: Request that the administrator grant import permission.
Tips & Notes
Section titled “Tips & Notes”- Begin with a small test file when unfamiliar with the process.
- Always retain a backup copy of the spreadsheet before importing.
- Columns containing numeric values with leading zeros (e.g. zip codes) should be formatted as Text in Excel to avoid dropping those zeros.
- Import progress may be monitored while the modal remains open or the user continues working elsewhere; the process runs asynchronously in the background.